Assessing the Damage

Before you begin any repairs, it’s essential to assess the damage to your cabinet. This will help you determine the best course of action and the necessary materials.
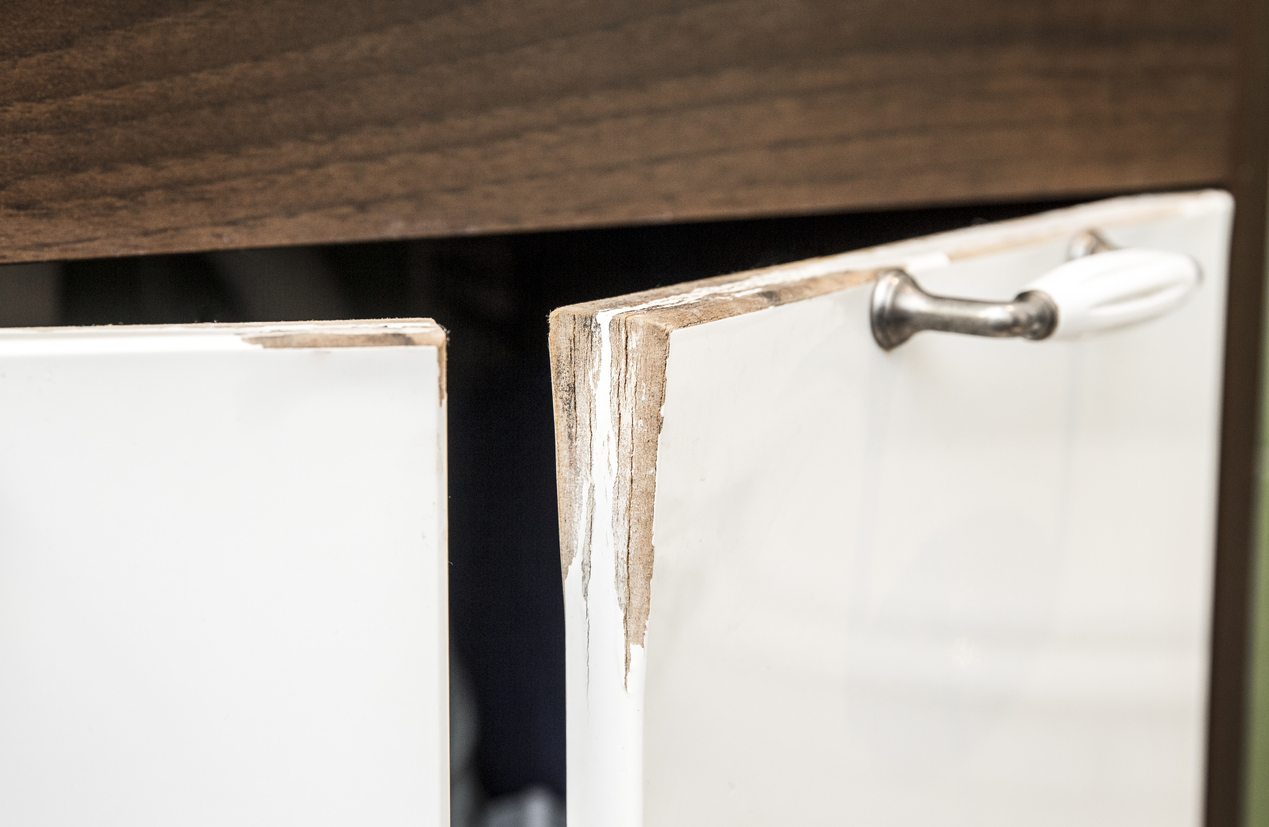
Types of Paint Chips, How to repair chipped paint on cabinets
Different types of paint chips can occur on cabinets, each requiring a slightly different approach to repair.
- Shallow Chips: These are small, superficial chips that only affect the top layer of paint. They usually don’t expose the underlying material.
- Deep Chips: These chips extend through multiple layers of paint, sometimes exposing the wood or laminate underneath.
- Scratches: These are long, thin marks on the surface of the paint, often caused by dragging something sharp across the cabinet.
Determining the Severity of Damage
The severity of the damage will determine the complexity of the repair.
- Minor Damage: Shallow chips and minor scratches can often be repaired with touch-up paint.
- Moderate Damage: Deep chips that expose the underlying material will require more extensive repairs, such as filling the chip with wood filler or using a paint scraper to remove loose paint.
- Severe Damage: Large chips or significant damage to the cabinet’s surface may require professional help or complete refinishing.
Assessing the Underlying Material
The material beneath the paint will also affect the repair process.
- Wood: Wood cabinets can be repaired using wood filler, sanding, and paint.
- Laminate: Laminate cabinets are more challenging to repair, as the laminate is a thin, non-porous material. Small chips can be filled with a specialized laminate filler, but larger damage may require replacing the entire panel.
- Other Materials: If your cabinets are made from other materials, such as metal or plastic, you’ll need to research the appropriate repair methods for that specific material.
Repairing the Chip
Once you’ve assessed the damage, it’s time to repair the chip. Several methods can be used to repair chipped paint on cabinets, each with its advantages and disadvantages.
Choosing the Right Repair Method
The best repair method depends on the size and depth of the chip. For small, shallow chips, touch-up paint may be sufficient. For larger or deeper chips, putty or wood filler may be necessary.
Touch-Up Paint
Advantages
- Easy to apply.
- Relatively inexpensive.
- Can be used for small, shallow chips.
Disadvantages
- May not completely hide the chip, especially if it’s deep.
- Can be difficult to match the existing paint color exactly.
Application
- Clean the chipped area with a damp cloth to remove any dirt or debris.
- Allow the area to dry completely.
- Apply a small amount of touch-up paint to the chip using a fine-tipped brush or toothpick.
- Avoid applying too much paint, as this can create a noticeable bump.
- Let the paint dry completely before applying a second coat if necessary.
Putty
Advantages
- Can be used for larger or deeper chips.
- Can be sanded smooth for a seamless finish.
Disadvantages
- More expensive than touch-up paint.
- Requires more time and effort to apply.
- May not be suitable for all types of paint.
Application
- Clean the chipped area with a damp cloth to remove any dirt or debris.
- Allow the area to dry completely.
- Apply a thin layer of putty to the chip using a putty knife.
- Smooth the putty with the putty knife, ensuring it is level with the surrounding surface.
- Allow the putty to dry completely according to the manufacturer’s instructions.
- Sand the putty smooth with fine-grit sandpaper.
- Apply a coat of primer to the repaired area.
- Allow the primer to dry completely.
- Paint the repaired area with the same paint used on the cabinet.
Wood Filler
Advantages
- Can be used for deep chips or gouges.
- Provides a strong, durable repair.
Disadvantages
- More expensive than putty.
- Requires more time and effort to apply.
- May not be suitable for all types of paint.
Application
- Clean the chipped area with a damp cloth to remove any dirt or debris.
- Allow the area to dry completely.
- Apply a small amount of wood filler to the chip using a putty knife.
- Smooth the wood filler with the putty knife, ensuring it is level with the surrounding surface.
- Allow the wood filler to dry completely according to the manufacturer’s instructions.
- Sand the wood filler smooth with fine-grit sandpaper.
- Apply a coat of primer to the repaired area.
- Allow the primer to dry completely.
- Paint the repaired area with the same paint used on the cabinet.
Finishing Touches: How To Repair Chipped Paint On Cabinets

The final steps in repairing chipped paint on cabinets involve blending the repaired area with the surrounding paint and applying a protective sealant to prevent future chipping. These steps are crucial to ensure a seamless and long-lasting finish.
Blending the Repaired Area
Blending the repaired area with the surrounding paint ensures a seamless transition and hides the repair. This is achieved by feathering the edges of the repaired area with a fine-grit sandpaper.
- Use a fine-grit sandpaper (400-600 grit) to gently sand the edges of the repaired area, blending it into the surrounding paint.
- Sand in a circular motion, gradually feathering the edges of the repair into the existing paint.
- Be careful not to sand too aggressively, as this can damage the surrounding paint.
Applying a Protective Sealant
Applying a protective sealant helps to prevent future chipping and protect the repaired area from scratches and moisture.
- A clear polyurethane sealant is a good option for cabinets, as it provides a durable and protective finish.
- Apply the sealant in thin coats, allowing each coat to dry completely before applying the next.
- Follow the manufacturer’s instructions for application and drying time.
Matching the Paint Color
Matching the paint color to the existing finish is crucial for a seamless repair.
- If the existing paint is a custom color, you may need to contact a professional paint supplier to get a color match.
- If the existing paint is a standard color, you can find a matching color at most hardware stores.
- Use a color matching system, such as a spectrophotometer, to ensure an accurate match.
How to repair chipped paint on cabinets – Right, so you’ve got chipped paint on your cabinets, yeah? A bit of a right mess, innit? Well, don’t stress, you can sort it out. First, you’ll need to sand down the chipped area, then you can apply a bit of filler to even it out.
Once it’s dry, you can prime it and paint it the same colour as your cabinets. If you’re feeling fancy, you could even go for a different colour, like that emerald green and pink bedroom I saw the other day – totally lush, innit?
But anyway, once you’ve painted it, you’ll be good to go. Just remember to let it dry properly before you start using the cabinets again, yeah?
Right, so you’ve got a few chips on your cabinets, eh? Not a biggie, just grab some sandpaper and touch-up paint. Maybe a bit of filler if it’s a deeper chip. But if you’re looking for a bit of a colour pop, you could always add a blush pink chair for bedroom – that’ll really lift the vibe.
Anyway, once your cabinets are looking fresh, you’ll be good to go.

